One of the most common questions I get asked as a colourist is how do you get bright, unnatural colour out of your hair. If you, like me, are not the black sheep, but the rainbow haired one in your circle… and love changing your hair colour to every colour of the kaleidoscope, as often as you change your undies, in the interest of keeping your hair remaining on your head… there are a few things you need to know first.
I first started dying my hair vibrant colours shortly after seeing a movie called Scott Pilgrim VS the World, after deciding I identified with and LOVED the hair of the main love interest, Ramona Flowers. Since then, I’ve learnt that she might have led my expectations astray. Ramona, in the film, non-chalantly changes her hair colour every week, depending on her mood, so… I assumed it was no biggie, and I could do the same. I know, I know… its not always like the movies, but, hey! I was young and just a little impressionable.

Consequently, I’ve learned some tricks and have a wee bit of a system that I have learned it is best to stick to for best results. Generally speaking, us rainbow sheep tend to get bored with our hair if we keep the same colour for too long, and also, kind of gravitate to the more vibrant and unnatural colours of the spectrum when we want to change colours, so, the following words of wisdom I’m about to give you are with that in mind, so, we can continue to deliver our bright multi-coloured prismatic beacons of goodness to the world.
Types of “hair dye”:
There are 3 types of “hair dye’s”… permanent, demi-permanent, and semi-permanent or ‘direct dye’.
Permanent dye is what covers grey hair, and leaves you with a demarcation over time as your hair grows. Permanent colours are the longest lasting kind of dye, however, they still fade with time. It is called permanent because it changes the chemical structure of your hair, not because the colour will remain forever the same colour.
Demi-permanent dye is your toner or shine gloss, which are designed to fade consistently over the course of 4-6 weeks, but do not change the chemical structure of your hair.
Semi-permanent direct dye – is the least damaging form of dye on the hair, and, is what is in my experience, what is going to give you consistently bright colour to your hair (if lightened to the correct level).
Lightening hair and the colour-wheel:
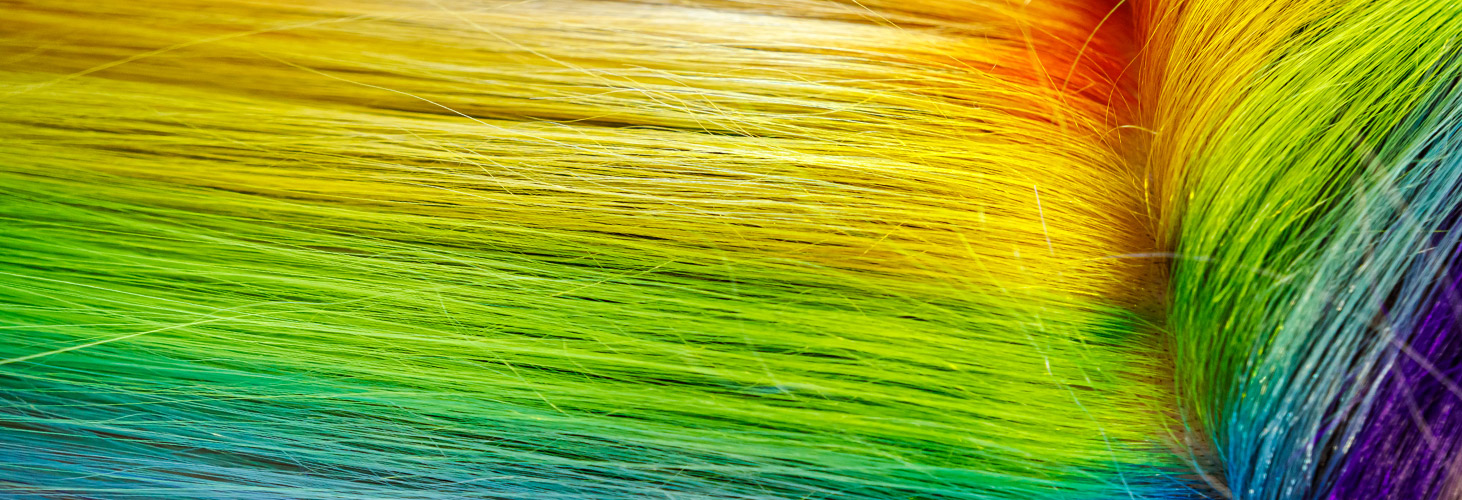
Picture of colour wheel
To begin, I would like to introduce you to the colour wheel. From this point onwards… it will become your best friend.
Hair is like a canvas, and you, the artist. Consider the colour wheel for a moment. If you are trying make purple, you would mix blue and red together. If you are trying to make orange, you would mix red and yellow together. If you are trying to make green, you would mix blue and yellow together, and so on.
How this is relevant is… when you lighten your hair, it is SUPER important that it is lightened to the correct level of lightness link to blog post on going from black to white… if your hair is lightened and there is ANY trace of yellow left in your hair (which means it hasn’t been lightened up enough), and you want to go blue… it will end up green because, yellow and blue when mixed together, make green. Similarly, if you want to go orange, you don’t need to lighten your hair to the same level you would have to for a blue. THAT is why I would recommend going to a professional colourist who understands the levels of lightening, so you won’t be disappointed. Once your hair has been lightened, you can embark on a maintenance regime.
Choosing which colour to go next:
Now… important question!… so which colour do you go next??? My advice? Is to go around the colour wheel… if you are yellow, next colour would be orange, then red, pink, purple, blue, green, before lastly coming back to yellow. This way, you avoid having to use lightener (which is the most damaging to your hair) in-between colours, and you will get some pretty cool variations of the colours as it fades from one colour to the next. REMEMBER that if you decide to not take my advice (hey, no judgement here! 😊)… that the colour opposite on the colour wheel, neutralises your hair colour, and will turn you brown (neutral colour in hairdressing science), so, use with caution 😊
How to get direct dye out of your hair:
*FACT: blue’s and green’s are the hardest direct dyes to remove from hair as although they are direct dye’s, they penetrate more than other direct dyes because of where they sit in relation to the hair cortex.*
1. Use a clarifying shampoo, and leave it on to sit. Use coconut or argon oil as a pre-treatment
The first port of call, will always be to try every option possible before using a lightener, which not only damages the hair, but, it can also just give you a lightened version of the original colour (eg: if you are hot pink, it might get you to a baby pink) not removing it entirely. The first method is to coat your hair with coconut oil (or argon oil if you are allergic), from roots to ends, and allow it to sit on for around 2 hours, as a pre-treatment to loosen up the colour molecules a little. Next, use a really clarifying shampoo, and, instead of rinsing it off, leave it on (use a shower cap), to let it sit. Use your hairdryer to apply heat over the cap for about 15 minutes before rinsing. Follow up with a good conditioner. This is the mildest form of gradually fading the hair
2. Use baking soda in your shampoo
Coat your hair with coconut or argon oil and leave for around 2 hours as explained previously. As in step 1, we are going to use the clarifying shampoo, and let it sit for 10-15 minutes, only this time, we are adding in a half teaspoon of baking powder to your shampoo. This is a slightly stronger form of fading your hair, so there is always a chance of drying out the hair… particularly as baking soda has a higher PH level, so, therefore, I would try a test strand first. Do not use heat.
3. Use Fairy Liquid or other dishwashing liquid to wash your hair
I’m aware that this is some pretty unconventional advice to come from a hair professional, and whilst this is NOT something I would recommend to do on the regular, as it dries your hair out completely, it DOES help you in getting over the line in shifting that last little bit of colour out if you’re wanting a clean change. Please ensure that you use a really, really good conditioning treatment or mask after shampooing to counter the dryness from the astringent in the dishwashing liquid. I recommend EVO Ritual Salvation Conditioner (leave it on for 10 minutes), or EVO Great Hydrator Treatment Mask (leave on for 10 minutes).
4. Use Malibu C Direct Dye Lifter
If there is STILL more fading to do, I would recommend using Malibu C Direct Dye Lifter. You mix this product with either water or 6% developer. Keep in mind that this is a more vigorous form of removing pigment, and should be treated as though you are working with lightener. Apply as per instructions, and watch your hair… I wouldn’t recommend leaving it on for more than 20 minutes. Usually – unless I am REALLY impatient or REALLY don’t like the colour on me and the colour is relatively fresh, I wouldn’t even get to this step as it is usually faded out enough from the first 3 methods.
5. Use Olaplex
Olaplex has been a TOTAL game changer and disrupter in the hairdressing industry for some years now, and for good reason! It is patented technology, and there are easily about 50+ different rip-off products that claim to do the same thing, but, they absolutely do not. I haven’t used them all, but I have used the Redken PH bonder, and also Cureplex, and I can say with total confidence that it isn’t just good marketing on Olaplex’s part, it is genuinely the only product on the market that does what it says it does.
What does Olaplex do? Well… imagine, when you are using lightener (or tints, or high-lift tints too, but, they aren’t as rough on the hair as lightener) and the lightener is like The Hulk, and is going in and smashing out all the colour molecules… and in the process, weakening the keratin/ protein bonds of your hair, thus creating damaged strands. Enter stage right – Olaplex! Who is kind of like Fonzy from Happy Days… coming in all smooth and suave, and puts a jacket around the hair strand to protect the bonds of the hair… which essentially build the bonds 3 times faster than the lightener is breaking them, which prevents damage to the hair occurring. Olaplex is not a miracle worker, as in it will not fix damage that has already occurred in the hair prior to using Olaplex, BUT it will stop any more damage from occurring if used correctly.
Olaplex is a 3 step process – step 1 is an additive to the lightener; step 2 is applied after rinsing out the lightener and before shampooing; and step 3 is your take home maintenance regime which you put on BEFORE shampooing your hair, leave it on for 10+ minutes (the longer the better… I have been known to leave it on overnight and even all day and use it as a styling product if I’m going for the ‘wet look’). There is now a step 4 and 5, but they aren’t necessary if you already have a great shampoo and conditioner that you love.
Step 3 is NOT a treatment though… it is a bond-builder, which can sound a little confusing. Basically, all it means is, that it won’t leave your hair feeling silky and shiny… its not designed for that. You still need a good conditioner or treatment as part of your home care. Use step 3 weekly or fortnightly… it goes a long way, so, you don’t need much… about a capful for medium length average density hair.
I truly do believe in this product with all my might, and believe that the only reason I have any hair left at all is because of Olaplex… I just wish I started using it sooner.
Pic of olaplex
6. Try a bleach bath
This is my very, very last resort, and honestly, seldom need to use it. A bleach bath is where you mix lightener, water, clarifying shampoo, olaplex step 1 and *possibly* a small amount of 6% developer (depending how much colour is still left to fade). Although this is less damaging than going in with straight lightener and developer, there is still a VERY high risk of causing damage to your hair, and absolutely recommend doing a strand test first. The process here, is, applying the mixture to your hair, and emulsifying it (just with your gloved hands) and watching it like a hawk until it has faded. Then rinse and shampoo like normal.
So, there you have it! Basically, if you keep in mind the rules of the colour wheel when changing colours, you may not even have a need to fade your colour, and can flip between one to the other fairly seamlessly. However, if you are impatient and want to change NOW, my best advice would be to let your hair fade naturally for a week or two, and then, prep with coconut or argon oil, and start with the least abrasive form of colour removal, and work your way down the list. PLEASE, also use Olaplex. Not only will you not cause extra damage to your hair, but your hair be in a good condition, which will actually help you maintain the brightness of your hair whilst you are that colour. In my humble opinion, I believe that ANYBODY who gets ANY kind of colour work done – blonding, tints, natural, unnatural colours… EVERYBODY should be using Olaplex.

